Patch Management
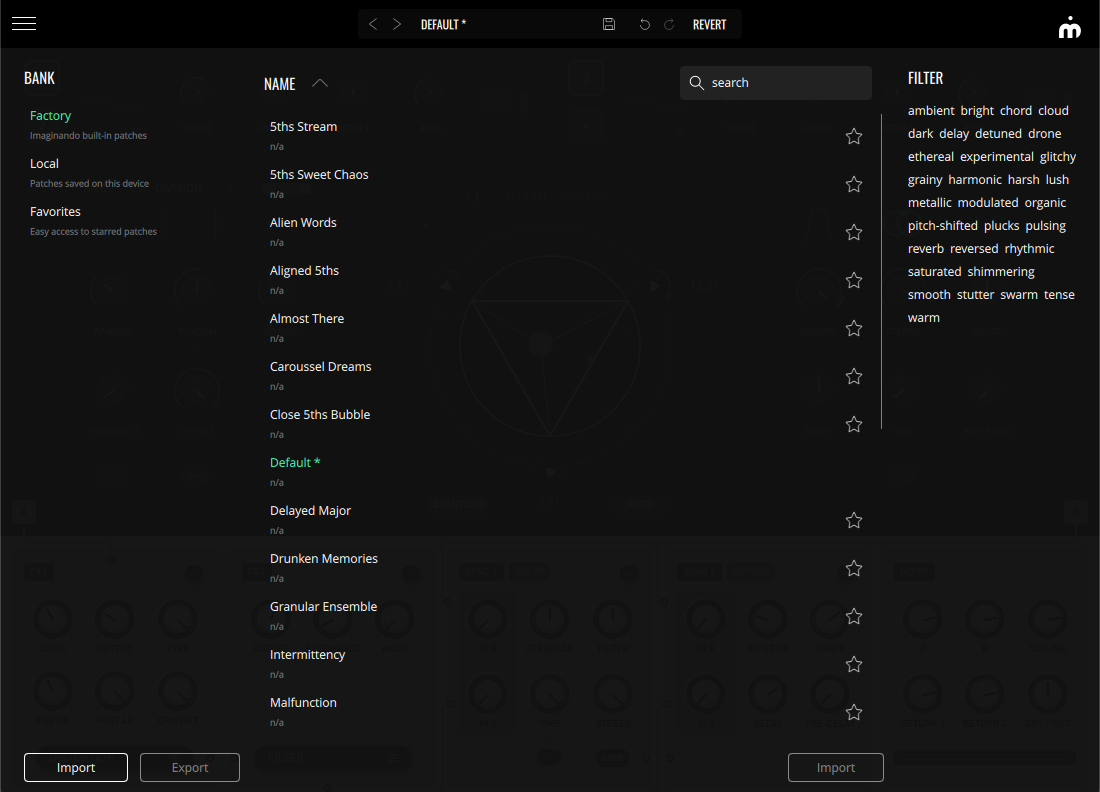
GRFX’s patch manager has a simple layout with banks displayed on the left, the selected bank's patches in the center and the tags pool for patch search filtering on the right.
On the top is the patch bar, which is always visible.

- Left Arrow - Selects the previous patch in the bank.
- Right Arrow - Selects the next patch in the bank.
- Patch Name - Opens/Closes patch browser.
- Save Icon - Opens the patch save dialog.
- Turning Left Arrow - Undo the last action.
- Turning Right Arrow - Redo the last action.
- Revert - Undoes unsaved changes, reverting the patch to its last saved state.
The patch browser’s left side contains three default banks:
- Factory - A selection of built-in patches.
- Local - The default bank where custom patches are saved
- Favorites - Provides a shortcut to all starred/favorited patches.
You can import/export customs banks with the import/export buttons on the bank section and you can also import custom patches to either the local bank or to custom banks using the import button in the patches section.
You can filter your patches either by name, using the search bar, or by tags by using the filter section.
To save a patch, click on the save icon  on the top bar. This will open the patch save dialog.
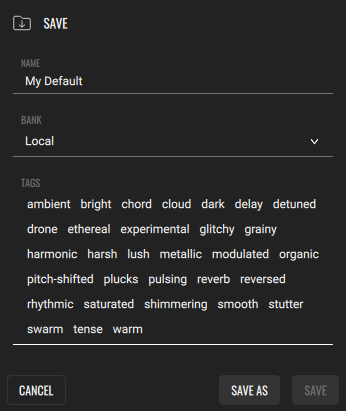
Here you can change the patch name, select the bank where you’ll save it and choose its tags. You can then save it as a new patch (save as), which will create a .gfp file, or you can overwrite an existing patch (save) if you’re using a name that is in use by another patch.
Previous: Effect Rack